Making a fantastic cup of coffee with a percolator is a tried-and-true method that has been around for a long time. It is not as well-known as other methods of brewing, yet it offers a flavor profile that is both distinctive and potent.
To make coffee in a percolator, you should add water to the bottom chamber, place coffee grounds in the perforated basket, assemble the percolator, and heat it on a stove. Allow the water to boil and percolate through the grounds for desired strength. Remove from heat and serve.
In this article, we will walk you through how to prepare coffee in a percolator and we will discuss all the necessary stages to help you master percolator coffee brewing.
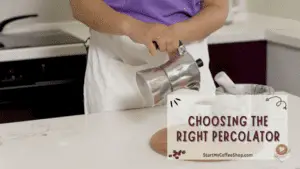
Choosing the Right Percolator

Before beginning the percolator coffee brewing procedure, it is essential to select the percolator that best suits your needs and preferences. Sizes and materials, like stainless steel or glass percolators, are widely available on the market. You’ll have a better time brewing if you take the time to choose the best one.
First, think about the percolator’s capacity. Consider how many cups of coffee you usually brew at once and select a percolator that meets your needs. A percolator with a higher capacity might be excellent if you frequently brew for a larger party or wish to have extra coffee on hand. In contrast, a percolator with a lesser capacity can be adequate for usage by one person or small groups.
Durability is another crucial aspect to take into account. A percolator built of high-quality materials that can tolerate frequent usage and withstand potential harm is what you should seek out. For instance, percolators made of stainless steel are renowned for being strong and long-lasting.
Another important factor to take into account is cleaning simplicity. Choose a percolator that is simple to disassemble and thoroughly clean. Some percolators have detachable, dishwasher-safe pieces, which can make cleanup easier. Select a percolator that fits your cleaning preferences after giving them some thought.
Read more about: Cost of Opening a Coffee Shop: Coffee Dreams, Budget Realities
Measuring Water and Coffee
It’s crucial to measure the water and coffee exactly to start the brewing process in a percolator. This step is crucial for giving your cup the desired flavor and power. A general rule of thumb is that one spoonful of coffee grinds should be used for every cup of water. It’s crucial to keep in mind that everyone’s tastes are different, so feel free to change the sizes to suit your preferences.
Making the ultimate cup of coffee requires striking the right balance between a weak and a robust brew. If you use too many coffee grounds, the flavor will be overbearing and unpleasant. If you use too little, the flavor will be muted. You can adjust the strength to your preferences by experimenting with various ratios.
You can choose to significantly cut back on the number of coffee grounds in each cup if you like a milder brew. On the other hand, if you prefer a stronger flavor, adding additional coffee grinds may give you the desired intensity. Finding the ideal balance that appeals to your palate is key.
Adding Water and Coffee Grounds
Pouring water into the bottom chamber of a percolator slowly will start the coffee-brewing process. It is very important to pay attention to and not go over the fill line marked inside the percolator. Overfilling can result in a mess and overflow during the brewing process.
The time has come to add the coffee grinds once the water has been added. Make sure the perforated basket or filter is clean and free of any debris or leftover coffee before using it. Maintaining the purity and flavor of your brew depends on this stage.
Distribute the coffee grounds into the basket in an even layer while holding it. It is strongly advised to use medium-coarse grounds for the best extraction. This grind size strikes a balance between too coarse, which could cause under-extraction and weak flavor, and too fine, which could cause over-extraction and bitterness.
For each coffee grind to have a chance to come into contact with the hot water during the percolation process, the coffee grounds must be distributed evenly throughout the basket. A rich and tasty cup of coffee is produced as a result of the oils and tastes being extracted.
Assembling the Percolator
Precision assembly of the percolator is required after the bottom chamber has been filled with water and the perforated basket has been filled with coffee grounds. This important step guarantees a smooth brewing process and stops any coffee grounds from leaking into the finished product.
To begin, fasten the percolator’s stem to the basket holding the coffee grinds. Make that the stem and basket are properly aligned and that they fit snugly. By doing this, you can be confident that the coffee grounds will stay in the basket throughout the brewing process. Place the basket inside the percolator’s bottom chamber filled with water once it has been firmly fastened. Make sure the basket and stem assembly is securely submerged in the water before carefully lowering it into the chamber.
A tight fit between the basket, stem, and bottom chamber is crucial. This guarantees a smooth, sediment-free cup of coffee by preventing any grounds from leaking into the freshly brewed beverage. Spend a moment checking the assembly to ensure that all parts are linked and positioned correctly. This focus on detail makes sure that the brewing process runs smoothly and enables you to enjoy a fresh cup of coffee.
Heating the Percolator
It’s time to proceed to the next phase, which is heating the percolator on a stove after the percolator has been put together. It’s essential to control the temperature during this phase if you want your coffee to be tasty and well-extracted.
Start by setting the assembled percolator on a medium-heated stove burner. Selecting a heat source that enables accurate temperature control is crucial. A gas burner is frequently favored because it responds more quickly to adjustments and makes fine-tuning the heat simpler.
It’s critical to keep a close check on the temperature as the percolator heats up. It’s important to keep the water from boiling too quickly because this can cause over-extraction and give the coffee a bitter taste. Maintaining a steady, regulated simmer is preferable to a rapid boil.
Lower the heat if you see the water boiling quickly so that the percolation process would be slower and more controlled. This will reduce the chance of over-extraction while still allowing the water to draw out the desired flavors from the coffee grinds.
Boiling and Percolating

It is crucial to let the water gradually warm up until it comes to a moderate boil as the percolator heats up on the burner. The coffee grounds are properly extracted thanks to the gentle heating procedure, producing a delicious and aromatic beverage.
The percolation process begins as soon as the water starts to boil. Pressure from the boiling water causes it to ascend through the stem and into the basket carrying the coffee grounds. By allowing the water to come into touch with the coffee grinds, the tastes, and oils are extracted and added to the brew throughout this process.
Monitoring the pace of bubbling closely is essential during the percolation process. Aim for a consistent flow of about one bubble every second. With the water moving through the coffee grinds at this moderate velocity, the amount of extraction is maximized.
It is vital to adjust the heat if you find that the bubbling rate is getting too fast or too slow. Reduce the heat to speed up the percolation process if the bubbling is happening too quickly. On the other hand, if the rate of bubbling is too slow, slightly raise the heat to keep things moving along.
Read more about: Cost of Opening a Coffee Stand: Unlocking the Register
Determining Brew Strength
The intensity and flavor profile of your coffee is significantly influenced by the percolator’s brewing time. It enables you to alter the flavor to suit your tastes. You can create a light, medium, or strong brew to suit your palate by modifying the brewing duration.
Aim to let the percolation process last for 5 to 7 minutes for a milder brew. With a lighter extraction possible during this time, the flavor is smoother and less potent. For those who want a softer and more delicate cup of coffee, it is a good option.
On the other hand, you can increase the brewing time to between 8 and 10 minutes if you prefer a bolder and more robust flavor. A deeper extraction is made possible by the longer period, resulting in a richer and more prominent coffee flavor. Find the precise brewing time that yields the required degree of strength by experimenting with various times within this range.
Since everyone has different tastes, it’s necessary to experiment and modify the brewing duration to suit your preferences. If you discover that your coffee is too weak, consider gently lengthening the brewing time. Alternately, reduce the brewing time if the flavor is too overpowering or bitter for your taste.
Removing from Heat and Serving
After the allotted time for brewing has gone, you should take the percolator away from the source of heat and be ready to serve the newly brewed coffee. However, because the percolator will be hot, it is essential to handle it with caution at all times.
Remove the percolator from the burner by carefully lifting it with oven mitts or pot holders, and set it down on a surface that is resistant to heat. Take a moment to make sure that you have a stronghold and that you are handling the item steadily so that you can avoid any inadvertent spills or burns.
Before pouring, give the coffee a few moments to settle after it has been brewed. This little period of resting helps the tastes to merge, allowing the coffee to reach its full potential in terms of flavor. It enables any residual grinds or particles to settle at the bottom of the percolator, which results in a cup of coffee that is cleaner.
Be careful not to spill the coffee into the cups, and keep your hand steady as you do so. Pour carefully and slowly to cause as little disruption as possible to the already-settled ground. You can help ensure that the coffee in your cups does not contain any undesirable grounds or sediment by pouring it gently, which will also result in a smoother and more pleasurable sipping experience.
If any coffee grounds escaped the basket while it was being used to brew the coffee, run the liquid through a fine-mesh sieve or a coffee filter as you pour it into individual cups. This will ensure that the coffee is completely free of any grounds.
Frequently Asked Questions

How long should I brew coffee in a percolator?
Depending on your preferred level of coffee strength, a percolator’s brewing duration can change. Aim for 5-7 minutes of percolation for a mild brew. To get a stronger flavor, let the tea steep for an additional 8 to 10 minutes. Adapt the length to your tastes.
Can I use any type of coffee grounds in a percolator?
It is advised to use medium-coarse coffee grounds in a percolator for the best results. The optimal extraction during the percolation process is made possible by the coarser grind. Finer grinds may result in excessive extraction and a potentially unpleasant flavor.
How do I clean a percolator after brewing?
A percolator is quite simple to clean. First, disassemble the percolator and take out the stem and basket. Use warm water to rinse all the parts to get rid of any leftover coffee grounds. To clean the percolator’s interior and exterior, use mild dish soap or vinegar and water solution. Before putting the percolator back together for another usage, give it a thorough rinse and let it air dry.
To learn more on how to start your own coffee shop, check out my startup documents here.
Disclaimer: The information provided by StartMyCoffeeShop.com (“The Site”) is for general informational purposes only. All information on the Site is provided in good faith. However, we make no representation or warranty of any kind, express or implied, regarding the accuracy, adequacy, validity, reliability, availability, or completeness of any information on the Site. Under no circumstance shall we have any liability to you for any loss or damage of any kind incurred as a result of the use of the Site or Reliance on any information provided on the Site. Your use of the Site and reliance on any information on the Site is solely at your own risk. This blog post is for educational purposes only and does not constitute legal advice. Please consult a legal expert to address your specific needs. Terms and Conditions. (https://startmycoffeeshop.com/terms-and-conditions/)

Hi! I’m Shawn Chun
My adventure in coffee began when I first launched my first coffee shop back in the early 2000s. I had to figure out so many things on my own and to make it worse within 2 years of opening two large corporate coffee chains moved in just blocks away from me!
As I saw smaller and even some larger coffee shops in the neighborhood slowly lose customers to these giant coffee chains and slowly close up shop, I knew that I had to start getting creative…or go out of business.
I (like you may be) knew the coffee industry well. I could make the best latte art around and the foam on my caps was the fluffiest you have ever seen. I even had the best state-of-the-art 2 group digital Nuova Simonelli machine money could buy. But I knew that these things alone would not be enough to lure customers away from the name brand established coffee shops.
Eventually, through lots of trial and error as well as perseverance and creativity I did find a way to not only survive but also thrive in the coffee/espresso industry even while those corporate coffee chains stayed put. During those years I learned to adapt and always faced new challenges. It was not always easy, however, in the end, I was the sole survivor independent coffee shop within a 10-mile radius of my location. Just two corporate coffee chains and I were left after that year. All told the corporate coffee chains took down over 15 small independent coffee shops and kiosks and I was the last one standing and thriving.
Along the years I meet others with the same passion for coffee and I quickly learned that it is not only “how good a barista is” that makes a coffee shop successful, but the business side of coffee as well.
Hence why I started this website you are on now. To provide the tools and resources for up and coming coffee shop owners to gain that vital insight and knowledge on how to start a coffee shop successfully.
Stick around, browse through my helpful blog and resources and enjoy your stay! With lots of LATTE LOVE!
Shawn


