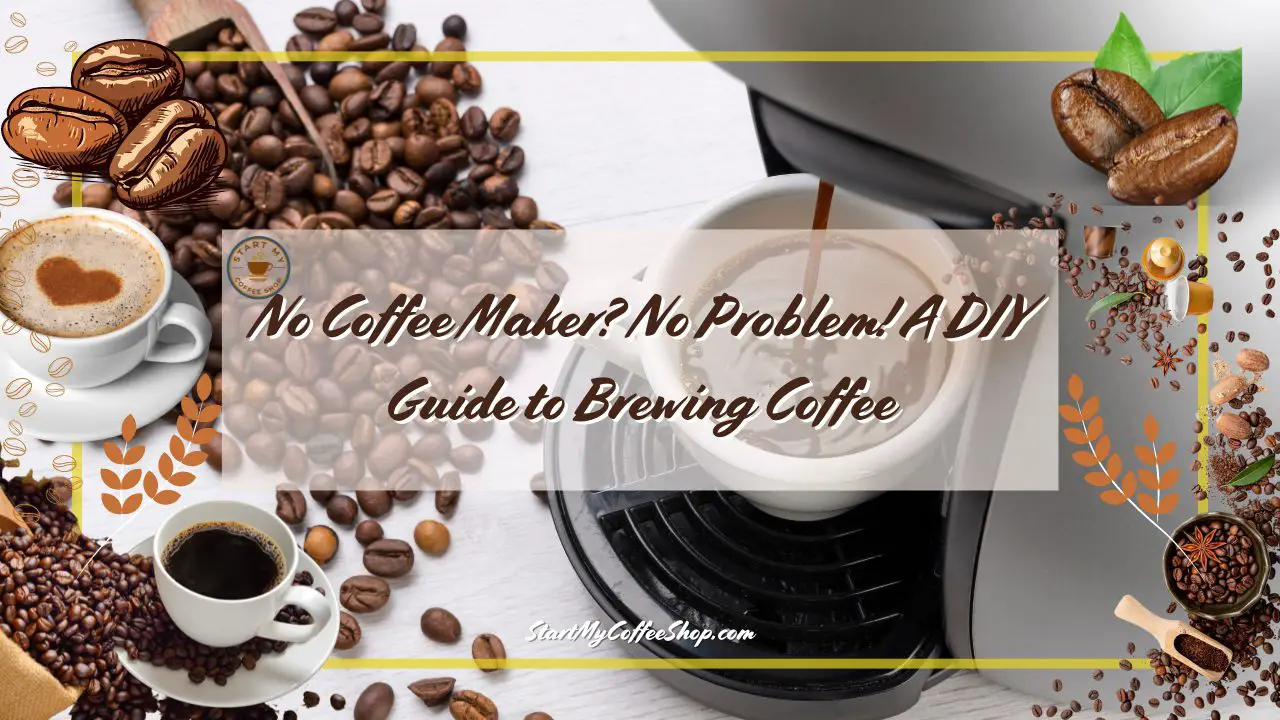
Coffee is a popular beverage enjoyed by millions of people worldwide. While coffee makers have become popular household equipment, there may be times when you find yourself without one. Fear not if you’re camping, traveling, or just don’t have access to a coffee machine! You can still make a tasty cup of coffee using other methods.
To brew coffee without a coffee maker, you should bring water to a boil, coarsely grind coffee beans, place the grounds in a heatproof container, pour hot water over them, stir, steep for a few minutes, then strain the coffee using a fine mesh sieve or cheesecloth.
In this article, we’ll walk you through the steps of brewing coffee without a coffee maker, using simple tools and supplies you’re likely to have on hand.
Boil Water

The significance of boiling water cannot be emphasized when making coffee without a coffee maker. The groundwork is laid in this first phase for the extraction of the rich flavors from the coffee grinds. Choose a kettle or a saucepan and start by adding the required amount of water. How much you need will depend on how many cups of coffee you plan to make.
Put the kettle or pot on the stovetop once it is full and turn the heat on. You’ll start to notice little bubbles emerging at the bottom of the container as the water progressively warms up. These bubbles will increase in size and frequently as the temperature rises, signaling that the water is getting close to boiling.
The water will continue to heat, so keep a constant check on it. You’ll soon get to a point where the water is rolling to a boil. This occurs when numerous, voluminous bubbles are agitating the water’s whole surface. You may be sure that the water is hot enough at this time to bring out the desired tastes in the coffee beans.
Because it aids in the release of the aromatic compounds and essential oils bound inside the coffee grinds, boiling water is necessary. These tasty components mix with water to produce the delightful beverage that we all enjoy. So, before moving on to the next steps of making coffee without a coffee machine, take your time to bring the water to a rolling boil.
Read more about: Coffee Pod Varieties: Discovering the Perfect Fit for Your Machine
Grind Coffee Beans
It’s the ideal time to focus on grinding the coffee beans as the water comes to a rolling boil. To maintain the best freshness and flavor of the coffee, the beans must be ground right before brewing. You may be sure the priceless oils and smells are preserved at their best by doing this.
It is advised to use a coarse grind for this method of brewing without a coffee maker. The larger size of coarse grounds aids in preventing excessive sediment from passing through during brewing. This guarantees a smoother, cleaner cup of coffee.
Don’t worry if you don’t have a coffee grinder at home. You can choose your favorite grind size at several supermarket stores that offer grinding services. Alternatively, you can investigate other utensils in your kitchen. You can use a blender by pulsing the beans briefly until the appropriate coarseness is reached. You can also manually smash the beans to the desired consistency using a mortar and pestle.
Although these substitutes might require a little more time and care than a specialist coffee grinder, they can nevertheless ground the beans for your brewing requirements. The secret is to make sure that the grind is consistently coarse so that proper extraction can take place while reducing sediment in the finished cup.
Prepare the Heatproof Container
It’s time to select an appropriate heatproof container to brew your coffee in after you’ve prepared the boiling water and ground your coffee beans. Depending on your preferences and the tools you have on hand, you have several possibilities. A French press, a heatproof glass jar, a mug, or a thermos are a few common options.
It is essential to choose a container that can bear the hot water without breaking or cracking and is heatproof. Seek out containers made especially for hot liquids or those that are constructed of borosilicate glass, stainless steel, or ceramic.
Make sure the chosen container is clean before continuing to avoid spreading any unfavorable flavors to your coffee. Your brew’s flavor may be harmed by leftover aromas or oils from prior uses.
Consider preheating the container with hot water to improve the brewing process even more. This procedure ensures a more consistent and satisfying cup of coffee by maintaining the coffee’s temperature during the brewing process. Just fill the container with hot water, then wait a few minutes. After that, pour out the water and add the coffee grounds.
When utilizing materials like glass or ceramic, which may cool down quickly, preheating the container is very advantageous. By preheating, you make the coffee brew in a warmer atmosphere, encouraging optimal extraction and maintaining temperature throughout.
Add Grounds and Pour Water
It’s crucial to pause briefly after the water has come to a rolling boil before starting the coffee brewing process. After removing the pot or kettle from the heat source, give it about 30 seconds to cool. A significant benefit of this little waiting period is that it allows the water temperature to gently drop, protecting the coffee grounds from burning.
The coarsely ground coffee should now be added to the chosen heatproof container after the brief break. For making coffee without a coffee machine, it is advised to use about 1 tablespoon of coffee every 6 ounces (180 milliliters) of water. You can, however, change this quantity to suit your tastes and level of strength.
Make sure that all of the coffee grinds in the container are completely saturated before slowly pouring the boiling water over them. Start with a modest amount of water, just enough to cover the grounds, to initiate the “bloom” process. Coffee releases trapped carbon dioxide during the blooming process, causing the beans to expand and increasing the flavors and fragrances of the finished drink. Before continuing to pour the remaining water, give the bloom roughly 30 seconds to happen.
Pouring the water slowly and evenly ensures that the coffee grounds are thoroughly saturated, which encourages flavor development and optimal extraction. By taking your time, you can produce a cup of coffee that is more flavorful and well-balanced.
Stir and Steep
It’s time to gently swirl the mixture after adding the hot water to the coffee grinds. To make sure that all of the grounds are completely submerged and spread evenly throughout the water, use a spoon or a coffee stirrer. Stirring is a crucial stage in the brewing process because it makes it easier for flavors to be extracted from the coffee and encourages consistency in flavor.
You can help make sure that every coffee particle is completely saturated and in contact with the hot water by swirling the coffee and water mixture. This equal distribution enables a more balanced extraction, producing a cup of coffee that is flavorful and well-rounded.
It’s time to cover the container after stirring the coffee. To maintain heat and let the coffee steep, use a lid or a heat-resistant plate. Allowing the coffee grinds to steep in hot water for an extended period to fully extract their flavors. Depending on your preferences and the strength you want to achieve, steeping times can vary.
As a general rule, strive for a medium-strong brew by steeping the coffee for 4 to 5 minutes. Nevertheless, you can change the steeping period to suit your taste. A cup with a shorter steeping time will have a softer flavor, but one with a longer steeping time will have a stronger, more powerful flavor.
Strain the Coffee

It’s time to part ways with the coffee grounds and extract the brewed liquid gold when the steeping period has passed. You will need a straining tool to accomplish this. You can use a cheesecloth piece, a coffee filter, or a sieve with tiny mesh.
Over a cup of your choice or a similar heatproof container, place the straining device. The coffee should be slowly poured through the strainer so that the grounds are caught but the liquid flows freely. The majority of the grounds will be captured by the fine mesh sieve or filter, leaving only the silky, aromatic coffee behind.
Do not worry if you are lacking a strainer or filter. With careful pouring, the brewed coffee can still be distinguished from the grounds. Pour the coffee while tilting the container just enough to leave as many grinds behind as you can. Due to the presence of fine sediment, this method could provide a slightly gritty texture, but it can still produce a good cup of coffee.
While filtering the coffee helps get rid of any extra grounds, it’s crucial to remember that some sediment can still be present. This is a feature of making coffee without a coffee machine and is an enjoyable experience. Before sipping your coffee, let the brewed coffee a few minutes to settle after straining to assist any remaining sediment settle at the bottom for a cleaner cup.
Read more about: Coffee Recipes for a Healthier You: Low-Calorie Options to Satisfy Your Cravings
Enjoy Your Coffee
After effectively straining your freshly brewed coffee, it’s time to unwind and enjoy the tasty outcome of your work. Pour your favorite mug with care, allowing the rich, warm liquid to cascade and fill the entire vessel. Take a moment to breathe in the alluring perfume that fills the air while you do this, tempting your senses.
It’s time to savor the tastes that await you while holding your cup of coffee in your hand. You can opt to drink your coffee black and savor its unadulterated, natural flavor. This enables you to fully appreciate the subtleties and intricacies of the coffee beans you chose and prepared with care.
Alternatively, if you’d like to customize your cup of coffee, feel free to add milk, cream, or any additional sweeteners of your choice. If you want to add some creaminess to your coffee, add a dash of milk or a dollop of cream. Sugar, honey, or flavored syrups can be used to offer a hint of sweetness, balancing the strong flavors or establishing the desired flavor profile.
Remember that there are many ways to drink coffee, so the decision is entirely up to you. Investigate various ratios and combinations to discover the ideal equilibrium for your palette. This is the time to indulge and enjoy the satisfying sensation of making your coffee without a coffee maker, whether you want a traditional black coffee or a unique creation.
Tips and Variations
- To find the right strength, experiment with various coffee-to-water ratios. Increase the amount of coffee grounds if your coffee is too weak, and vice versa.
- To make sure your water is at the ideal brewing temperature, which is between 195°F and 205°F (90°C to 96°C), think about using a thermometer.
- After filtering the coffee, let it sit for a few minutes to enable any remaining sediment to settle at the bottom if you prefer a cleaner cup.
- Before brewing, sprinkle a little salt over the coffee grinds to lessen the bitterness and improve flavor in general.
- Before savoring your freshly prepared coffee, top it with some cocoa powder, cinnamon, or nutmeg for a hint of decadence.
Frequently Asked Questions
Can I use pre-ground coffee in place of freshly ground coffee?
If you don’t have access to a coffee grinder, you can use pre-ground coffee. However, bear in mind that pre-ground coffee could not be as fresh as freshly ground beans. To avoid too much sediment in your coffee, pick a coarser grind that is designated for techniques like the French press or pour-over.
How can I control the strength of my coffee without a coffee maker?
You can alter the coffee-to-water ratio and steeping duration to regulate the strength of your coffee without a coffee maker. Increase the amount of coffee grounds or increase the steeping time for a stronger brew. On the other hand, if you like a milder cup, brew less coffee or steep it for less time. Try varying these factors to find the strength you want.
Can I use different filters if I don’t have a cheesecloth or fine mesh sieve?
Absolutely! You can substitute other filters, such as a paper towel, a clean cloth, or even a clean sock, as a makeshift filter if you don’t have a fine mesh sieve or cheesecloth. Pour the made coffee slowly into your cup or container while securely placing the filter material over it to strain out the grounds. Even though it might not be as effective as specialized filters, it still has its uses.
To learn more on how to start your own coffee shop, check out my startup documents here.
Disclaimer: The information provided by StartMyCoffeeShop.com (“The Site”) is for general informational purposes only. All information on the Site is provided in good faith. However, we make no representation or warranty of any kind, express or implied, regarding the accuracy, adequacy, validity, reliability, availability, or completeness of any information on the Site. Under no circumstance shall we have any liability to you for any loss or damage of any kind incurred as a result of the use of the Site or Reliance on any information provided on the Site. Your use of the Site and reliance on any information on the Site is solely at your own risk. This blog post is for educational purposes only and does not constitute legal advice. Please consult a legal expert to address your specific needs. Terms and Conditions. (https://startmycoffeeshop.com/terms-and-conditions/)

Hi! I’m Shawn Chun
My adventure in coffee began when I first launched my first coffee shop back in the early 2000s. I had to figure out so many things on my own and to make it worse within 2 years of opening two large corporate coffee chains moved in just blocks away from me!
As I saw smaller and even some larger coffee shops in the neighborhood slowly lose customers to these giant coffee chains and slowly close up shop, I knew that I had to start getting creative…or go out of business.
I (like you may be) knew the coffee industry well. I could make the best latte art around and the foam on my caps was the fluffiest you have ever seen. I even had the best state-of-the-art 2 group digital Nuova Simonelli machine money could buy. But I knew that these things alone would not be enough to lure customers away from the name brand established coffee shops.
Eventually, through lots of trial and error as well as perseverance and creativity I did find a way to not only survive but also thrive in the coffee/espresso industry even while those corporate coffee chains stayed put. During those years I learned to adapt and always faced new challenges. It was not always easy, however, in the end, I was the sole survivor independent coffee shop within a 10-mile radius of my location. Just two corporate coffee chains and I were left after that year. All told the corporate coffee chains took down over 15 small independent coffee shops and kiosks and I was the last one standing and thriving.
Along the years I meet others with the same passion for coffee and I quickly learned that it is not only “how good a barista is” that makes a coffee shop successful, but the business side of coffee as well.
Hence why I started this website you are on now. To provide the tools and resources for up and coming coffee shop owners to gain that vital insight and knowledge on how to start a coffee shop successfully.
Stick around, browse through my helpful blog and resources and enjoy your stay! With lots of LATTE LOVE!
Shawn